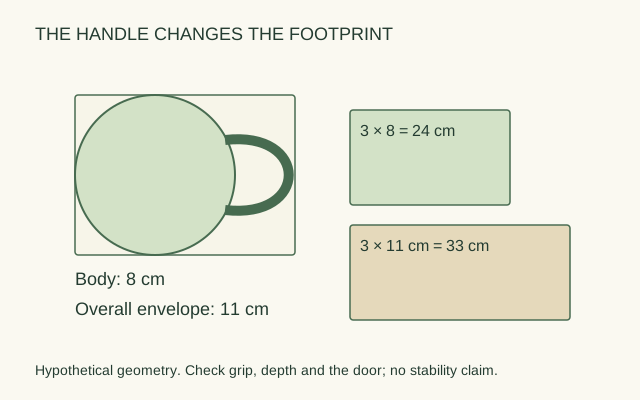
A row can fail even when cup-body widths add up neatly. Handles project beyond the body, and the amount of space they need depends on orientation. Measure the full footprint at the widest points rather than multiplying the diameter of the cup itself.
Use a paper outline of one mug viewed from above. Mark the body, handle and direction in which you grip it. These are geometry checks. They do not establish safe stacking, resistance to tipping or an appropriate shelf load.
Separate body width from envelope
Imagine a mug with an 8 cm body diameter and an 11 cm overall width from body edge to outer handle. Its depth is 8 cm when the handle points sideways. Three body diameters total 24 cm, but three full side-facing envelopes require 33 cm before gaps.
| Illustrative 32 × 24 cm shelf | Width per mug | Depth per mug | Three across? |
|---|---|---|---|
| Handles pointing to the right | 11 cm | 8 cm | No: 33 cm exceeds 32 |
| Handles pointing toward the front | 8 cm | 11 cm | Geometrically yes: 24 cm across |
The second arrangement leaves 8 cm across before handling gaps. It does not prove that every mug can be gripped comfortably or that its handle stays inside the closed door. The front clearance may need to increase when the handles face outward.
Measure the usable arrangement
Set paper footprints inside the actual shelf boundary and include any front lip or hinge strip. Try the middle mug's retrieval path with a representative real mug while the neighboring spaces are occupied. If your hand needs to enter beside the handle, reserve that space explicitly.
Alternating handle directions can create overlapping envelopes on paper, but the overlap needs a real geometric and retrieval check. Do not assume it increases capacity. For a simple reliable plan, compare regular orientations first and choose the one whose access you can reproduce.
Keep fragile and unusual shapes visible
Large handles, tapered bodies and matching saucers change the outline. Record these pieces separately instead of averaging all mugs into one nominal size. A tall mug also needs a height check; a floor plan cannot show a handle or rim colliding with the shelf above during removal.
Write down the chosen direction, full footprint and clearance before buying a tray or riser. Follow the actual product's instructions for any added equipment. If the shelf becomes difficult to reset, reduce the count or separate occasional pieces. A spare strip is useful when it makes the daily grasp possible.
ORIGINAL REFERENCE DIAGRAM